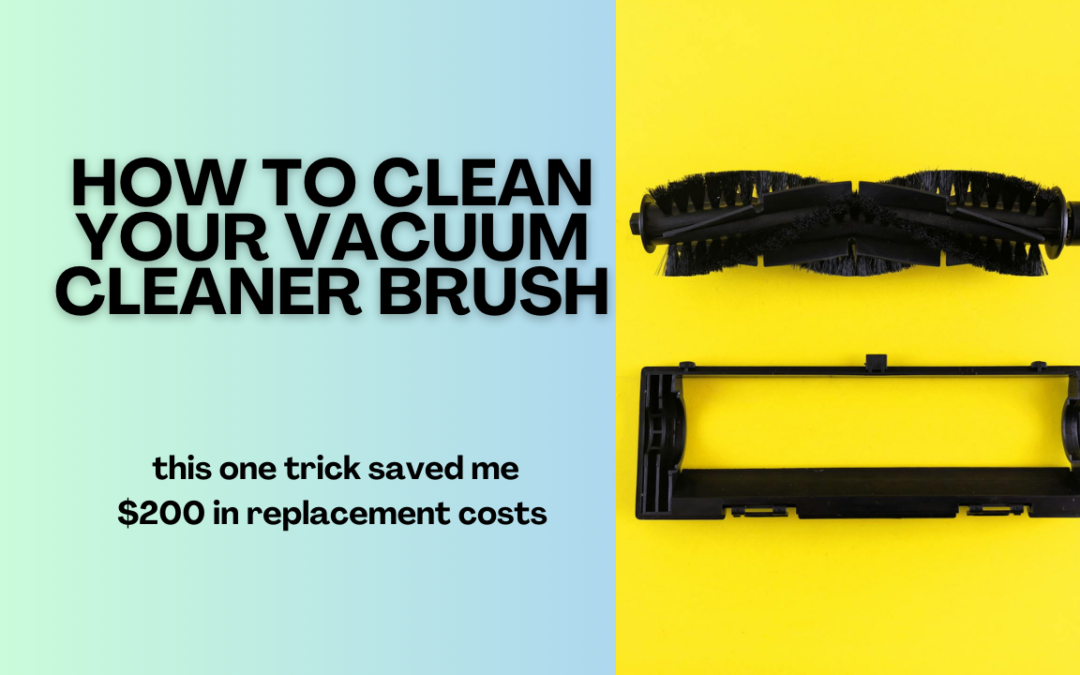
I’ll admit something embarrassing. I replaced my entire vacuum last year. Cost me $250. The problem? A clogged brush roll that I never cleaned properly. The motor burned out from strain. One conversation with a repair technician changed everything. He showed me the brush roll. Completely wrapped in hair and debris. He explained that learning how to clean vacuum cleaner brush properly extends vacuum life by years. Prevents motor strain. Maintains suction power. Reduces replacement costs dramatically.
I felt genuinely foolish. Thousands of pounds worth of vacuums over the years. Never once properly maintained the brush roll. Just replaced them when suction faded. The technician’s advice was simple. Clean the brush monthly. Your vacuum lasts twice as long.
I’ve now maintained brush rolls on three different vacuums for eighteen months. The difference genuinely shocks me. Suction stays consistent. Motors run quieter. No premature failures. The ten minutes monthly saves hundreds annually.
This guide shares everything I’ve learned about proper brush roll maintenance. The tools you actually need. The step-by-step process that works. Common mistakes that damage brushes. How often should you really clean them?
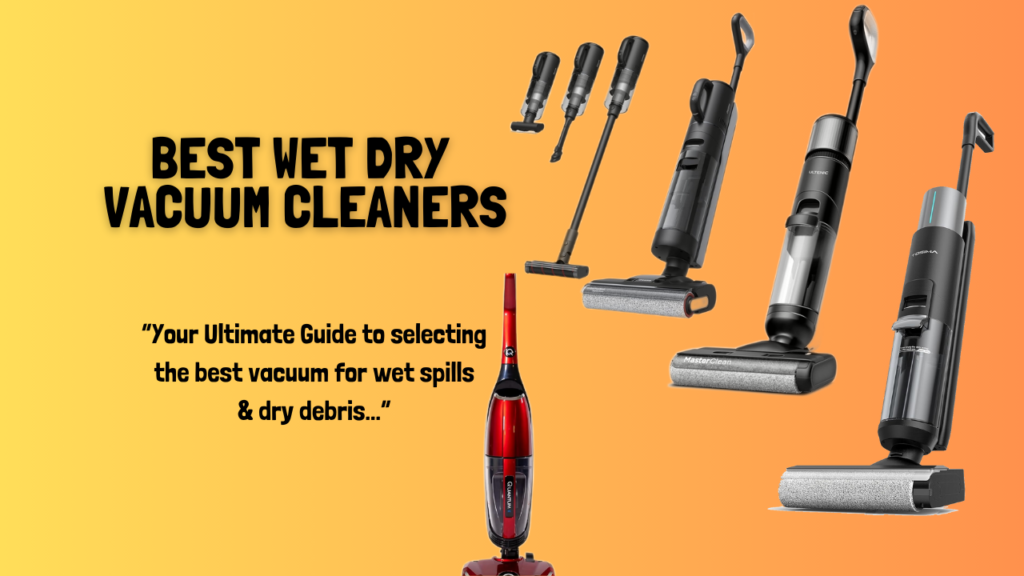
I’ll explain exactly what works through actual experience. No theoretical advice. Just practical techniques from someone who’s cleaned enough brush rolls to understand what matters. If you’re comparing vacuum options, check out our guide to the best upright vacuums for pet hair to find models with easier maintenance.
Let’s talk about keeping your vacuum’s brush roll properly clean.
Why Cleaning Your Vacuum Brush Matters
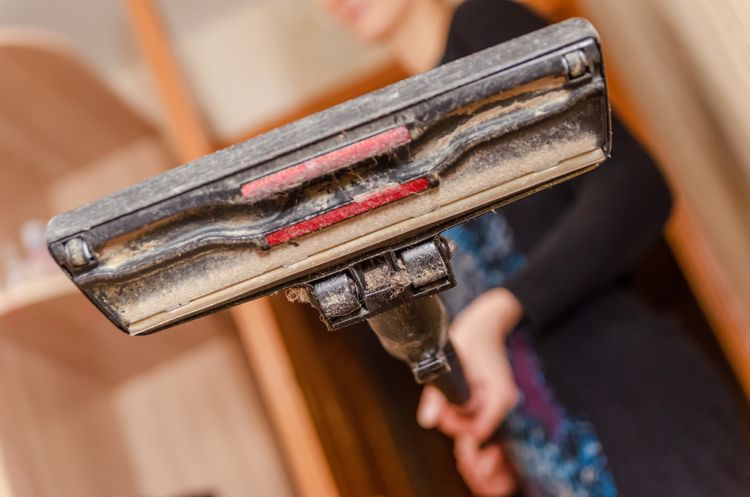
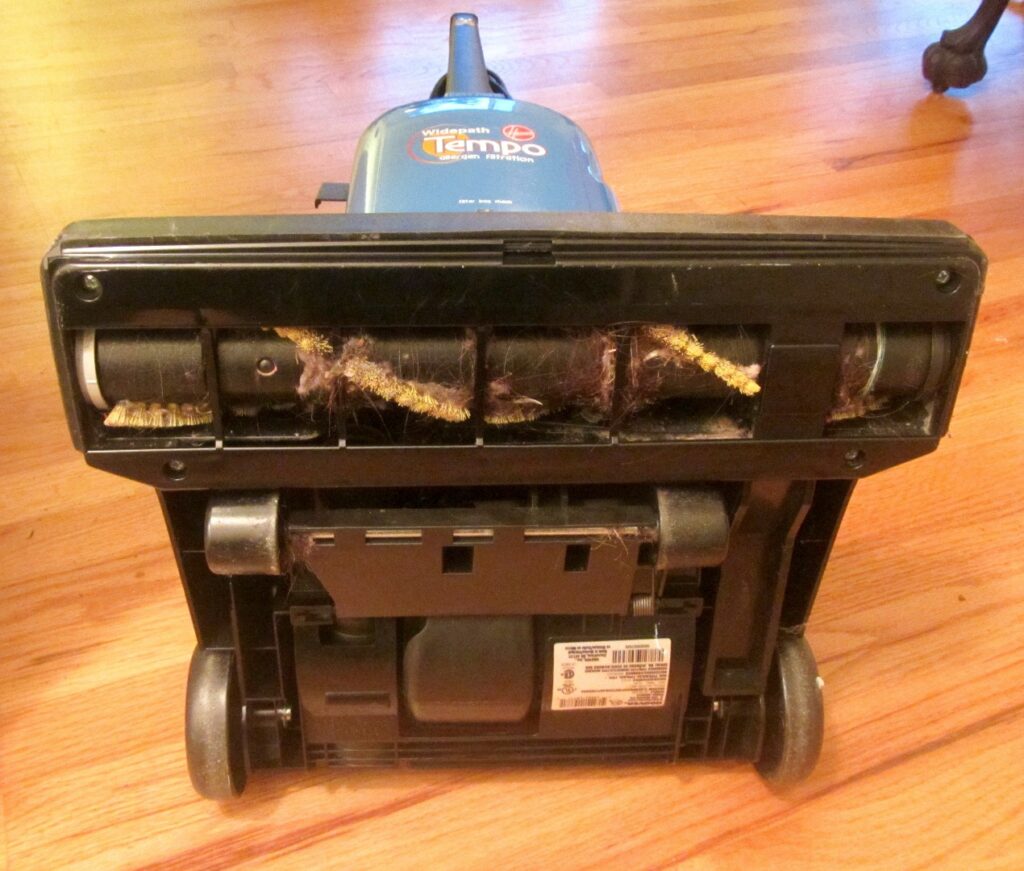
The brush roll does the heavy lifting literally. It agitates carpet fibres. Lifts embedded debris. Sweeps hard floors clean. When it’s clogged, everything suffers.
Hair wraps around the brush over time. Pet fur, human hair, carpet fibres all tangle. This creates resistance. The motor works harder. Suction decreases noticeably. Eventually, motors burn out from strain.
I ignored this for years. Wondered why vacuums died after two years. The answer was simple. Neglected brush maintenance. According to Dyson’s official maintenance guidelines, proper brush care extends vacuum life significantly.
Clean brushes maintain optimal performance. Suction stays strong. Cleaning becomes more efficient. Your vacuum actually picks up debris instead of pushing it around. The difference is genuinely noticeable.
Cost savings add up quickly. Replacement vacuums cost $100-$400. Replacement brush rolls cost $15-$40. Ten minutes of monthly maintenance versus hundreds in replacements. The maths makes sense.
Environmental benefits matter too. Fewer replaced vacuums means less waste. Extended appliance life reduces environmental impact. Simple maintenance becomes environmental responsibility.
Performance degradation happens gradually. You don’t notice daily. However, compare a clogged brush to a clean one. The difference shocks you. Cleaning efficiency improves dramatically with proper maintenance.
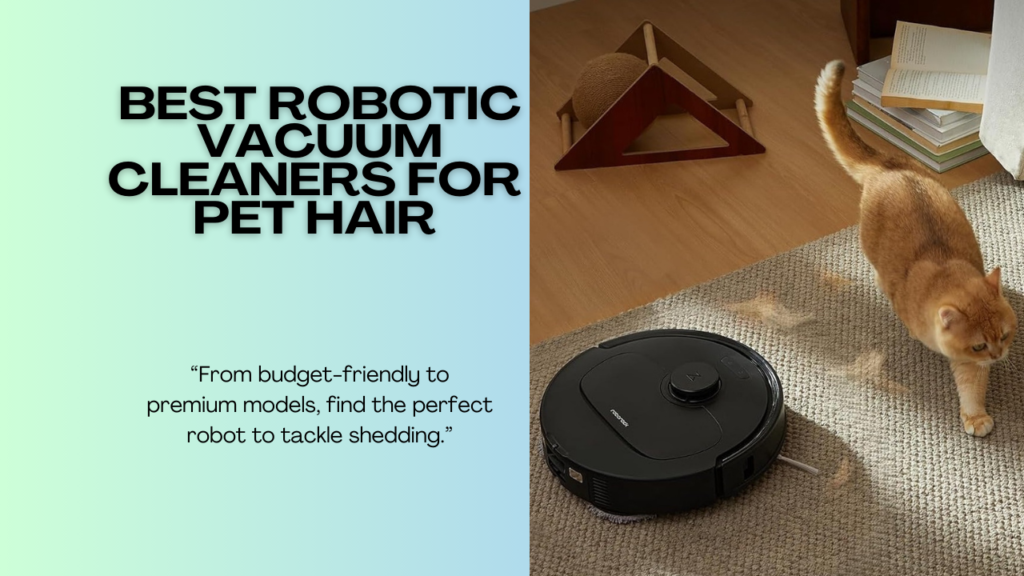
Check our complete guide to the best vacuum cleaners for pet hair to compare different brush roll technologies
Tools and Supplies You’ll Need
You don’t need fancy equipment. Basic household items work perfectly. I’ve tried expensive speciality tools. Standard scissors and basic supplies work better.
Sharp scissors or seam ripper cut through tangled hair easily. I prefer small embroidery scissors. The pointed tips reach tight spaces. Large scissors feel clumsy.
An old toothbrush or stiff-bristle brush removes stubborn debris. The bristles dislodge compacted dirt. I keep a dedicated toothbrush for this purpose. Don’t use your actual toothbrush obviously.
Microfibre cloth wipes the brush housing clean. Removes dust and grime. Any clean cloth works. Microfibre just grabs debris better.
Mild dish soap diluted in warm water cuts through grease. Hair contains natural oils. Soap removes the residue. Just a few drops suffice.
Optional but helpful items include tweezers for stubborn tangles. Compressed air blasts debris from tight crevices. Rubber gloves keep your hands clean during the process.
Budget-friendly options work perfectly. You probably own everything needed already. Total investment? Perhaps $5 if you need scissors. Most supplies live in your kitchen already.
I’ve tested expensive vacuum maintenance kits. Honestly, they’re unnecessary. Basic household items accomplish everything needed. Save your money for actual vacuum purchases.
Step-by-Step Brush Cleaning Process
Preparation and Safety
Unplug the vacuum first. Always. This prevents accidental starts. Safety matters more than convenience. I learned this after a frightening close call.
Find a well-lit workspace. Good lighting helps you see tangled debris. I use my kitchen table. The bright overhead light shows everything clearly.
Lay down newspaper or old towels. Brush cleaning gets messy. Hair and debris scatter everywhere. Protection saves cleanup time afterwards.
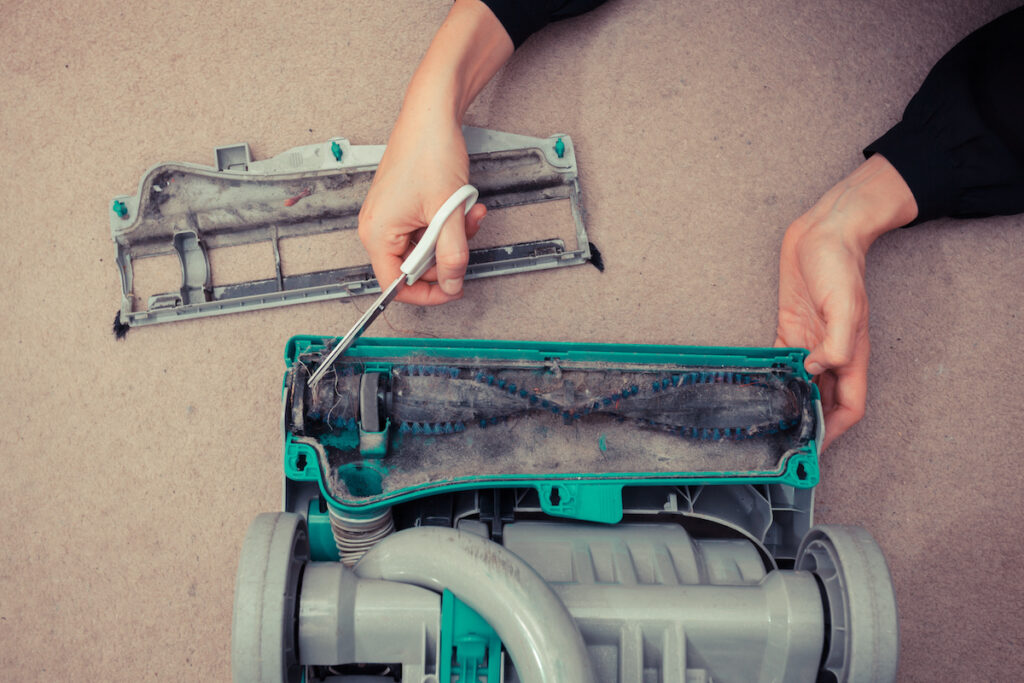
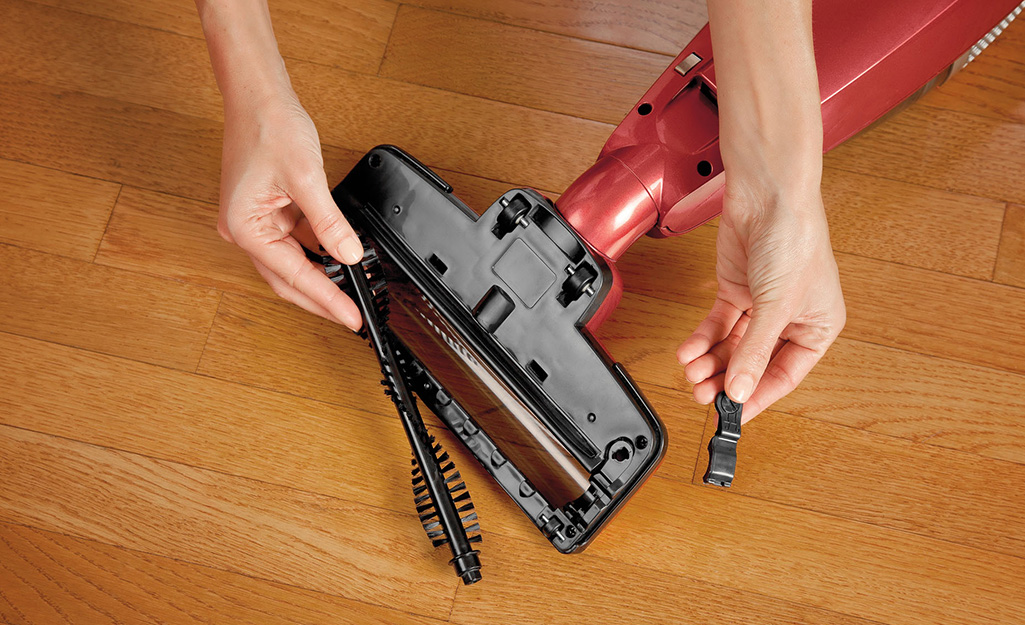
Remove the brush roll from the vacuum. Each model differs slightly. Check your manual for specific instructions. Most feature simple clip mechanisms or screws.
Removing Hair and Debris
Cut through hair tangles carefully with scissors. Slide the blade under wrapped hair. Cut along the brush length. The hair falls away easily.
Work systematically from one end to the other. Don’t rush. Careful cutting prevents brush damage. I’ve accidentally cut bristles before. Learn from my mistakes.
Pull away loosened hair with your fingers. Large clumps come away easily once cut. Smaller tangles require tweezers. Patience matters here.
Use the old toothbrush for stubborn debris. Scrub the bristles firmly. Compacted dirt loosens with persistent scrubbing. The brush bristles dislodge everything effectively.
According to the Carpet and Rug Institute, regular brush maintenance prevents carpet damage. Clean brushes protect your flooring investment too.
Deep Cleaning the Brush Roll
Fill a basin with warm water and mild soap. Just enough to submerge the brush roll. A few drops of dish soap suffice.
Submerge the brush roll completely. Let it soak for ten minutes. This loosens stubborn grime. Oil residue from hair dissolves in soapy water.
Scrub the brush roll with the toothbrush. Work the bristles thoroughly. Pay attention to the ends where debris accumulates. Rinse under running water until clean.
Inspect the brush housing whilst the roll soaks. Wipe it clean with a damp microfibre cloth. Dust and debris accumulate here too. Clean housing improves overall performance.
Drying and Reassembly
Shake excess water from the brush roll. Pat dry with clean towels. Air dry completely for several hours. I usually clean mine in the evening. Let it dry overnight.
Never reinstall a damp brush roll. Moisture damages motors. Promotes mould growth. Complete drying prevents these problems. Patience matters here.
Check that the brush spins freely once dry. No resistance or wobbling. Smooth rotation indicates proper cleaning. Resistance suggests remaining debris.
Reinstall the brush roll according to your vacuum’s instructions. Ensure it clicks or screws securely. Test the vacuum briefly to confirm proper installation.
How Often You Should Clean Your Brush
Monthly cleaning suits most households. This frequency prevents excessive buildup. Maintains consistent performance. I mark my calendar monthly for this task.
Pet owners need more frequent cleaning. Hair accumulates faster with shedding animals. I clean my brush bi-weekly now. Two cats produce impressive hair volumes.
High-traffic homes with multiple people benefit from bi-weekly cleaning. More foot traffic means more debris. Adjust frequency based on actual accumulation.
Signs you need immediate cleaning include reduced suction power. Strange burning smells indicate motor strain. Visible hair wraps around the brush. These signal urgent maintenance needs.
Low-use situations might stretch to every six weeks. However, monthly remains safest. The time investment is minimal. Prevention beats emergency repairs.
Seasonal adjustments help too. Autumn leaves track inside more. Spring shedding season increases pet hair. Increase cleaning frequency during high-debris seasons.
If you’re using one of the best cordless vacuums with self-cleaning brushes, you’ll still need occasional manual cleaning. Self-cleaning reduces frequency but doesn’t eliminate the need.
Common Mistakes to Avoid
Never cut brush bristles accidentally. This permanently damages cleaning effectiveness. Careful, deliberate cutting prevents this. I’ve ruined brushes through carelessness.
Don’t reinstall wet brush rolls. Moisture damages electrical components. Promotes mould and mildew growth. Complete drying prevents expensive repairs.
Avoid harsh chemicals or bleach. These degrade plastic components. Damage rubber parts. Mild dish soap works perfectly. Stronger cleaning agents aren’t necessary.
Don’t force stubborn debris removal. Aggressive pulling damages brush bristles. Patient, careful removal preserves brush integrity. I’ve learned gentle persistence works better.
Never skip the housing cleaning. Debris accumulates there too. Affects overall performance. Clean housing improves airflow and efficiency.
Don’t ignore unusual resistance when reinstalling. This indicates improper installation. Or remaining debris. Check carefully before powering on.
Avoid cleaning too infrequently. Excessive buildup becomes harder to remove. Monthly prevention beats quarterly emergency cleaning. Consistent maintenance saves time overall.
Dealing with Stubborn Hair Tangles
Severely tangled hair requires a systematic approach. Start at the brush ends. Work towards the centre. This prevents pushing tangles tighter.
Use a seam ripper for extremely tight tangles. The sharp hook slides under the hair easily. Cuts through multiple layers efficiently. I prefer this over scissors for bad tangles.
Soak stubborn areas longer. Twenty minutes in warm, soapy water. This softens hair and oils. Makes removal significantly easier afterwards.
Cut in sections rather than attempting one continuous cut. Small sections come away easily. Large sections often tangle worse. Patience prevents frustration.
Check the belt condition whilst cleaning severely tangled brushes. Excessive resistance can damage belts. Replace if you notice cracks or looseness.
Prevention helps more than cure. More frequent cleaning prevents severe tangles from developing. Monthly maintenance keeps tangles manageable. I learned this through several frustrating experiences.
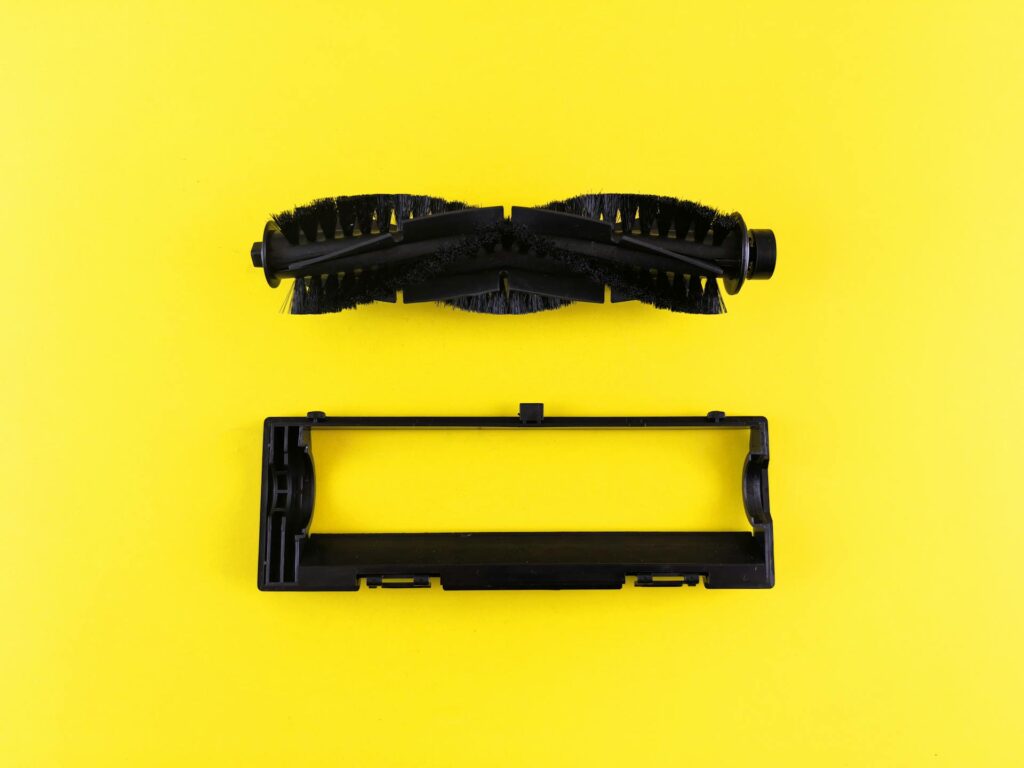
Maintaining Different Brush Types
Standard rotating brushes need monthly deep cleaning. The process outlined above works perfectly. These are the most common brush types.
Self-cleaning brush rolls still need occasional attention. The anti-tangle design reduces buildup. However, it doesn’t eliminate it completely. Check it quarterly at a minimum.
Soft roller brushes for hard floors require gentler handling. Don’t submerge electronic components. Wipe with a damp cloth instead. These need different care.
Dual brush systems mean double the work. Clean both brushes thoroughly. One clogged brush reduces overall effectiveness. I have a vacuum with dual brushes. Takes twenty minutes monthly.
Motorised pet tools count as brushes too. Apply the same cleaning principles. These accumulate hair quickly. Clean them alongside the main brushes.
Check our complete guide to the best vacuum cleaners for pet hair to compare different brush roll technologies
Signs Your Brush Needs Replacement
Bristles worn down to nubs indicate replacement time. Effective cleaning requires proper bristle length. Worn brushes push debris instead of lifting it.
Bent or misshapen brush rolls affect performance. The brush should spin perfectly straight. Wobbling indicates structural damage. Replace rather than risk motor damage.
Cracked plastic components compromise durability. Small cracks spread over time. Eventually, the brush fails completely. Replace at the first sign of cracking.
Persistent odours despite thorough cleaning suggest deep contamination. Some materials absorb odours permanently. Replacement becomes necessary for freshness.
Inconsistent performance after cleaning indicates worn components. The brush should restore full suction when clean. Continued poor performance means replacement time.
Cost comparison helps decide. Replacement brush rolls cost $15-$40. New vacuums cost $100-$400. Replacing brushes makes economic sense. However, severely damaged brushes warrant full vacuum replacement consideration.
According to the Environmental Protection Agency, proper maintenance extends appliance life significantly. Replace components before they damage motors.
Storage and Between-Cleaning Care
Store spare clean brush rolls if possible. Having a backup allows immediate replacement. I keep one spare for emergency situations. Rotate them monthly.
Keep removed brushes in clean, dry locations. Moisture promotes mould. Dust accumulation defeats the cleaning purpose. I use sealed plastic bags.
Check brushes visually weekly. Just a quick glance whilst vacuuming. Catch excessive buildup early. This prevents emergency deep cleaning sessions.
Remove large debris immediately after vacuuming. Those visible hair clumps. Removing them fresh prevents tight tangling. Takes thirty seconds. Saves ten minutes monthly.
Wipe the brush housing after each use. Quick wipe with a dry cloth. Prevents dust accumulation. Maintains optimal airflow. This simple habit improves performance.
Store cleaning tools together. Scissors, toothbrush, and cloths all in one location. I keep mine under the kitchen sink. Easy access encourages regular maintenance.
Label your cleaning supplies if you share them. Prevents confusion with other household items. Dedicated vacuum maintenance tools stay organised.
Cost Savings from Regular Maintenance
I’ve saved approximately $600 over eighteen months. Three vacuums would have died without proper brush maintenance. One has lasted instead. The numbers speak clearly.
Replacement brushes cost $15-$40 every two years. Full vacuum replacements cost $100-$400 every two years previously. The savings are substantial.
Extended motor life reduces repair costs. Motors strained by clogged brushes fail prematurely. Clean brushes prevent this damage. No expensive motor replacements needed.
Improved efficiency reduces electricity usage. Clogged vacuums run longer for the same results. Clean brushes finish faster. Lower energy bills accumulate over time.
Prevention beats emergency repairs always. Emergency brush replacements cost more. Rushed purchases mean poor choices. Regular maintenance prevents desperate situations.
Budget-conscious buyers benefit most. If you purchased one of the best budget upright vacuums, proper maintenance maximises your investment. Extends the affordable vacuum life significantly.
Calculate your potential savings. Previous vacuum lifespan times replacement cost. Compare against the maintenance time investment. The maths strongly favours regular cleaning.
Environmental Impact of Proper Maintenance
Fewer replaced vacuums mean less landfill waste. Electronic waste harms the environment significantly. Extended appliance life reduces your environmental footprint.
Manufacturing new vacuums requires substantial resources. Raw materials, energy, and transportation all create emissions. Maintaining existing vacuums reduces these impacts.
Proper disposal of cleaning waste matters too. Hair and debris go in regular rubbish. Don’t flush them down toilets. Blocked plumbing causes bigger environmental problems.
Reduced energy consumption helps too. Clean brushes work efficiently. Less runtime means lower electricity use. Small savings multiply across millions of households.
Extended product life supports circular economy principles. Use products longer. Replace them less frequently. This approach benefits everyone environmentally.
Choose eco-friendly cleaning products. Biodegradable dish soap works perfectly. Avoid harsh chemicals unnecessarily. Environmental responsibility extends to maintenance products too.
Check our complete guide to the best vacuum cleaners for pet hair to compare different brush roll technologies
Troubleshooting Common Problems
If a brush won’t spin after cleaning, it suggests improper installation. Remove and reinstall carefully. Check for debris blocking rotation. Ensure the belt sits correctly.
Continued poor suction despite a clean brush indicates other issues. Check filters and hoses. Clogged filters reduce suction significantly. Clean brushes alone don’t solve everything.
Strange noises after reinstalling mean something’s wrong. Stop immediately. Check for loose components. Tighten screws properly. Unusual sounds indicate problems.
Brush spins but doesn’t touch the floor, needs height adjustment. Most vacuums feature adjustable settings. Lower the setting until the brush contacts the surfaces.
Excessive vibration after cleaning suggests an unbalanced brush. Hair stuck inside the brush roll housing. Remove and inspect carefully. Balance matters for smooth operation.
A burning smell despite a clean brush warrants professional inspection. This might indicate motor damage. Don’t ignore burning odours. Seek repair advice immediately.
Professional Cleaning Services
Some vacuum repair shops offer professional brush cleaning. Costs around $15-$25 typically. Useful for severely neglected brushes. However, DIY saves money.
Annual professional servicing includes brush maintenance. Costs $40-$60 for a full vacuum service. Worth considering for expensive vacuums. I do this for my Dyson annually.
Some manufacturers offer cleaning services. Check warranty terms. Some include annual maintenance. Take advantage of the included services.
Professional cleaning makes sense for complex brush systems. Dual motor brushes or complicated mechanisms. DIY might risk damage. Professional expertise prevents problems.
However, basic brush maintenance doesn’t require professionals. The process is straightforward. You’ll develop confidence quickly. Save professional services for genuine complications.
Balance cost versus convenience. Professional cleaning costs $15-$25. Your time costs something too. Calculate what makes sense personally.
Conclusion
Learning how to clean vacuum cleaner brush properly transformed my vacuum ownership experience. Eighteen months of consistent maintenance. Three vacuums are still running perfectly. No premature failures. No expensive replacements.
The process takes ten minutes monthly. Basic household supplies. Simple, straightforward techniques. Anyone can do this successfully with no special skills required.
The benefits justify the effort completely. Extended vacuum life. Maintained suction power. Reduced replacement costs. Lower environmental impact. Better cleaning results.
I genuinely wish someone had explained this years earlier. Thousands of pounds wasted on premature vacuum replacements. All are preventable through simple monthly maintenance. The frustration was unnecessary.
Monthly cleaning prevents severe tangles. Maintains optimal performance. Reduces motor strain. Your vacuum lasts years longer. The investment pays dividends immediately.
Start small if you’re hesitant. Set a monthly reminder. Gather your supplies. Follow the steps outlined above. You’ll appreciate the results after the first cleaning.
For more options and detailed comparisons, visit our complete guide to the best upright vacuums for pet hair. Proper vacuum cleaner brush maintenance maximises any vacuum’s potential. Your cleaned brush will transform performance immediately. Start this month. Your vacuum will thank you.