Have you ever stood in your garage or utility room and wondered whether installing a permanent vacuum system in your home is brilliant forward-thinking or expensive madness? I’ve been exactly where you are now, weighing the substantial upfront investment against years of frustration with portable vacuums that seem to break down the moment the warranty expires. That’s why I’m writing this comprehensive guide about installing a central vacuum system in your home.
The decision to install a built-in vacuum system isn’t one you make lightly. You’re not just purchasing an appliance; you’re modifying your home’s infrastructure with piping runs, inlet valves, and permanent installations that will serve you for decades. Unlike buying a portable vacuum you can return if it disappoints, central vacuum installation requires careful planning, significant investment, and commitment to the long-term benefits.
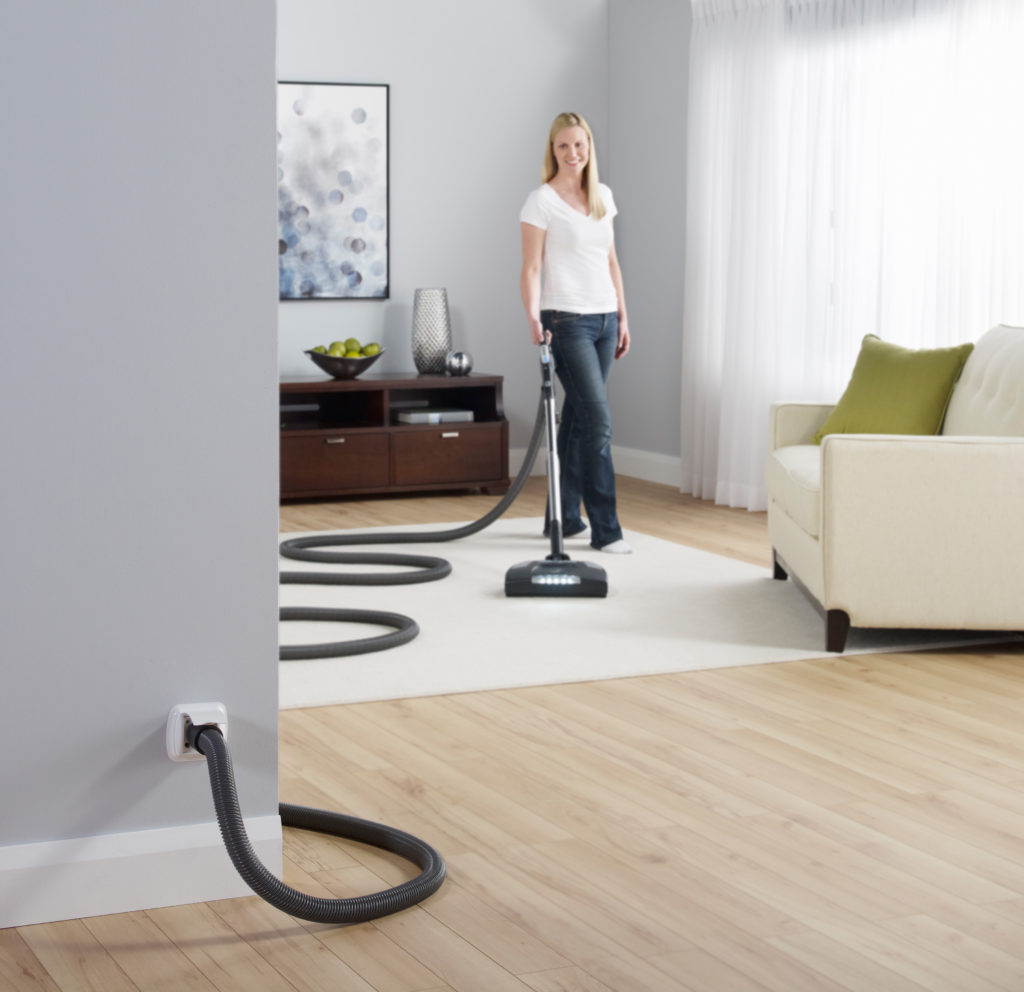
But here’s what makes this decision so compelling: when done properly, a central vacuum system genuinely transforms how you maintain your home. The convenience of inlet valves throughout your house, the powerful suction that portable units cannot match, and the quiet operation that keeps noise away from living spaces all combine to create a cleaning experience that’s fundamentally different from what you’re used to.
In this guide, I’ll walk you through everything you need to know before, during, and after installing a central vacuum system. We’ll cover how to assess whether your home is suitable, what to look for when choosing components, realistic cost expectations, installation options (DIY versus professional), and how to maximise your investment’s value. I’ll also share the common mistakes that lead to disappointing results and how to avoid them.
Whether you’re building a new home and considering central vacuum installation from the start, or you’re retrofitting an existing property and wondering if it’s worth the disruption, this guide will help you make an informed decision. If you’re comparing specific systems and want detailed reviews, check out our comprehensive guide to the best central vacuum systems to see which units perform best.
This matters because installing a central vacuum system represents a significant investment in your home and your family’s daily life. Getting it right means decades of convenient, powerful cleaning. Getting it wrong means expensive regrets and a system you rarely use. Let’s make sure you get it right.
Check Our List Of The Best Central Vacuum Systems
Understanding Your Home and Installation Requirements
Before you even think about which central vacuum system to buy, you need to understand whether your home is suitable for installation and what specific challenges your property presents. This assessment phase is crucial because it determines everything from total costs to whether installation is even practical.
Home Size and Layout Considerations
The size of your home directly impacts the complexity and cost of central vacuum installation. Properties between 150-350 square metres represent the sweet spot where central vacuum systems deliver optimal value. Smaller homes may not justify the installation costs, whilst larger properties might require multiple power units or exceptionally powerful motors.
Your home’s layout matters tremendously. Single-storey homes are significantly easier to retrofit than multi-level properties. Open-plan designs require careful inlet placement planning to ensure adequate coverage. Homes with finished basements, accessible attics, or crawl spaces offer easier piping routes than properties where all walls are finished.
Consider how many floors you have and where the power unit can be located. Utility rooms, garages, and basements are ideal locations. The unit needs an electrical supply, and ideally should vent to the exterior for optimal performance and air quality benefits.
Floor Types Throughout Your Home
Central vacuum systems excel on all floor types, but understanding your flooring mix helps you choose appropriate accessories and power requirements. Homes with extensive carpeting benefit from more powerful motors (700+ Air Watts) and motorised carpet cleaning heads. Properties with primarily hard flooring can use slightly less powerful systems whilst still achieving excellent results.
Mixed flooring is increasingly common in modern homes. Carpeted bedrooms combined with hard-surface living areas mean you’ll need versatile cleaning tools and potentially adjustable suction settings. The beauty of central vacuum systems is that the consistent power adapts to any surface with appropriate attachments.
Thick pile carpets, especially in high-traffic areas, require serious suction power. If you’ve got shag carpets, deep-pile rugs, or Berber carpeting, prioritise systems rated at 700 Air Watts or higher. Hard floors, including tile, hardwood, laminate, and luxury vinyl, respond brilliantly to central vacuum systems with proper floor brushes.

Specific Challenges: Pets, Allergies, and Family Situations
Pet ownership significantly influences central vacuum decisions. Dogs and cats that shed heavily produce enormous amounts of hair that clog portable vacuums rapidly. Central vacuum systems with large capacity (18-20 litres) and powerful motors (700+ Air Watts) handle pet hair effortlessly. The bagless designs mean you’re not constantly purchasing replacement bags.
Allergy and asthma sufferers gain particular benefit from properly installed central vacuum systems. When vented to the exterior, these systems remove allergens, dust mites, and microscopic particles completely from your indoor environment rather than partially recirculating them through filters.
Families with young children appreciate the safety aspects of central vacuum systems. There’s no heavy unit to tip over, no hot motor surfaces to touch, and no power cords to trip over. The lightweight hose and wand are manageable even for older children, potentially turning cleaning into a shared family responsibility rather than a parent-only chore.
Central Vacuum System Components Explained
Understanding the key components of central vacuum systems helps you make informed decisions about what to buy and how to install it. Unlike portable vacuums, where everything is integrated, central systems comprise several distinct elements that work together.
The Power Unit
The power unit is the heart of your system, typically mounted in the garage, utility room, or basement. This unit contains the motor, dirt collection chamber, and filtration components. Power units range from 500 Air Watts for smaller homes to 800+ Air Watts for large properties or demanding situations.
Motors are rated for lifespan in hours of operation. Quality units offer 1500-2000 hours of rated life, translating to 15-25 years of typical household use. The motor type matters: dual-stage bypass motors with ball bearing construction last longer and run cooler than single-stage designs.
Dirt collection capacities typically range from 15-20 litres. Larger capacities mean less frequent emptying, but anything over 20 litres becomes unwieldy to empty. Bagless systems dominate the modern market, using cyclonic separation to protect motors whilst eliminating consumable costs.
Piping and Installation Materials
PVC piping connects your power unit to inlet valves throughout your home. Standard 50mm (2-inch) PVC pipe is the industry standard, running through walls, floors, and ceilings to create a network of suction points. The piping must be properly supported and sealed to maintain suction throughout the system.
Installation requires various fittings, including elbows, T-joints, and couplings, to navigate your home’s structure. Quality installations minimise bends and maintain gradual angles to optimise airflow. Sharp 90-degree bends reduce suction efficiency, so good installers use swept elbows wherever possible.
Low-voltage wiring runs alongside the piping to provide electrical activation signals. When you insert a hose into any inlet valve, the electrical connection signals the power unit to start. Some systems use mechanical activation, but electrical systems offer better reliability and more features.
Inlet Valves
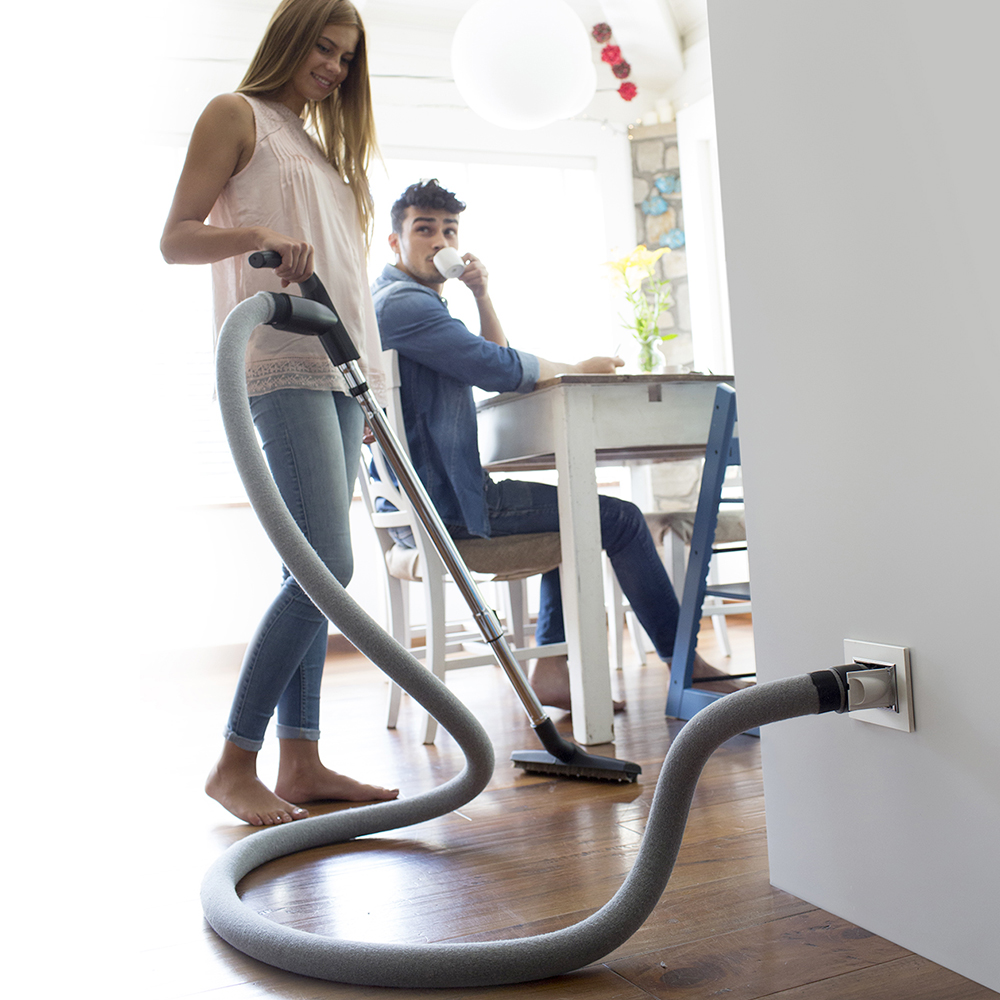
Inlet valves are the access points where you connect your hose to the system. Strategic placement of these valves throughout your home determines how convenient the system is to use. Most homes need 3-6 inlet valves for complete coverage, positioned so that a 9-metre hose reaches all areas.
Standard inlet valves are simple ports that activate the system when you insert the hose. Automatic dustpan inlets are increasingly popular in kitchens, allowing you to sweep debris towards the inlet where it’s automatically sucked away. These specialised inlets add convenience for daily kitchen cleanup.
Inlet valve quality varies significantly between brands. Quality valves feature robust electrical contacts, smooth hose insertion, and durable faceplates. Cheap valves develop electrical faults or mechanical wear after a few years, whilst premium valves last for decades without issues.
Hoses, Wands, and Cleaning Tools
The hose is what you’ll carry throughout your home, typically 9-12 metres long to provide adequate reach from each inlet. Quality hoses feature electrical connections for powered tools, comfortable handles, and durable construction that resists kinking and splitting.
Telescopic wands extend your reach for high ceilings and make storage more compact. Most users prefer lightweight aluminium or composite materials that don’t fatigue your arms during extended cleaning sessions. The wand length should suit your height for comfortable operation.
Cleaning tools include floor brushes for hard surfaces, powered carpet heads for deep cleaning, crevice tools, upholstery attachments, and dusting brushes. Investing in quality tools significantly impacts your cleaning results. Powered carpet heads with rotating brushes transform carpet cleaning performance compared to basic suction-only tools.
Check Our List Of The Best Central Vacuum Systems
Key Features That Actually Matter for Central Vacuum Systems
When evaluating central vacuum systems, certain specifications and features impact your daily experience far more than marketing hype suggests. Understanding which features matter helps you spend money wisely rather than paying for unnecessary bells and whistles.
Suction Power and Motor Specifications
Air Watts is the most important specification for central vacuum performance. This measures actual suction power at the inlet, not just motor input. Systems rated at 600-650 Air Watts suit most homes adequately. Properties with extensive carpeting, multiple pets, or large square footage benefit from 700-750+ Air Watts.
Don’t confuse Air Watts with motor watts. A system might advertise “1800 Watts” which refers to electrical input, not cleaning performance. The Air Watts rating tells you what actually reaches your cleaning tool. Quality manufacturers prominently display Air Watts; budget brands often hide this specification.
Motor longevity ratings range from 1000-2000 hours of operation. Higher ratings cost more initially but deliver better long-term value. A motor rated for 2000 hours should last 20-25 years in typical residential use. Sealed ball bearing construction and dual-stage designs last longer than cheaper single-stage motors.
Filtration Systems and Air Quality Benefits
True HEPA filtration captures 99.97% of particles down to 0.3 microns, including allergens, dust mites, and fine dust. Not all central vacuum systems include HEPA filtration; some use basic foam filters that protect the motor but don’t address air quality concerns.
The critical question is where the filtered air exhausts. Systems vented to the exterior provide maximum air quality benefits because nothing returns to your indoor environment. Systems with indoor exhaust should definitely include HEPA filtration. This explanation of HEPA filter standards clarifies why proper filtration matters for health.
Self-cleaning filters reduce maintenance requirements. Some systems automatically clean their filters when you turn off the unit, extending the interval between manual cleanings. This convenience feature is worth paying for if you want a truly low-maintenance operation.
Dirt Capacity: How Much Is Enough?
Central vacuum dirt chambers typically hold 15-20 litres, vastly more than portable vacuums’ 1-3 litre capacities. In practical terms, 18-20 litre capacity means emptying every 3-4 months in average households. Pet owners might need more frequent emptying, whilst single occupants could go 6 months between emptyings.
Larger capacities sound appealing, but chambers over 20 litres become heavy and awkward when full. The sweet spot is 18-20 litres, providing generous capacity without becoming unmanageable. Transparent chambers let you monitor fill levels easily without opening the unit.
Bagless designs dominate modern central vacuum systems, using cyclonic separation to collect debris whilst protecting motors. This eliminates the ongoing cost of replacement bags and the frustration of tracking down compatible bags years after purchase. The environmental benefits of not disposing of bags regularly also appeal to eco-conscious homeowners.
System Capacity: How Many Inlets?
Power units specify maximum inlet capacity, typically ranging from 5-8 inlets. This determines how many access points you can install throughout your home. Most residential installations use 3-6 inlets, leaving capacity for future additions if you finish basements or expand living spaces.
More inlets aren’t always better if they’re poorly placed. Strategic planning matters more than quantity. A well-designed 4-inlet system with optimal placement outperforms a 6-inlet system with awkward positioning that leaves coverage gaps or requires excessive hose dragging.
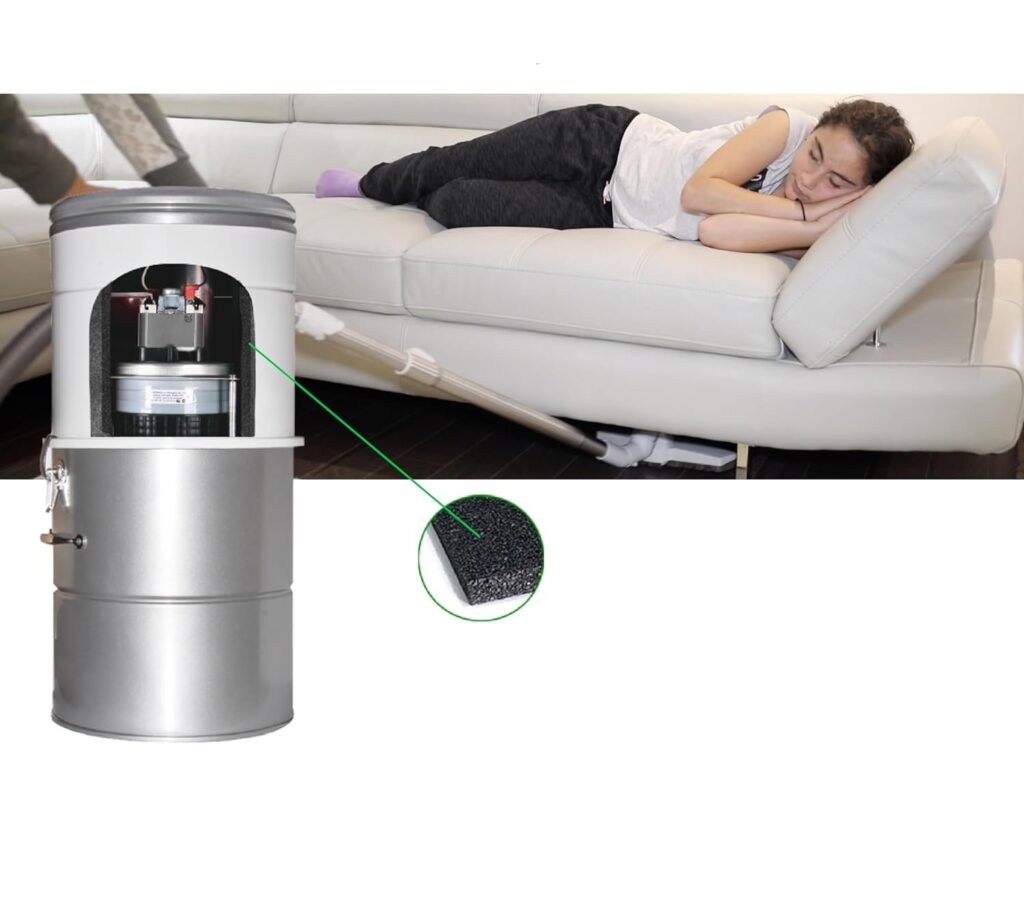
Noise Levels and Sound Dampening
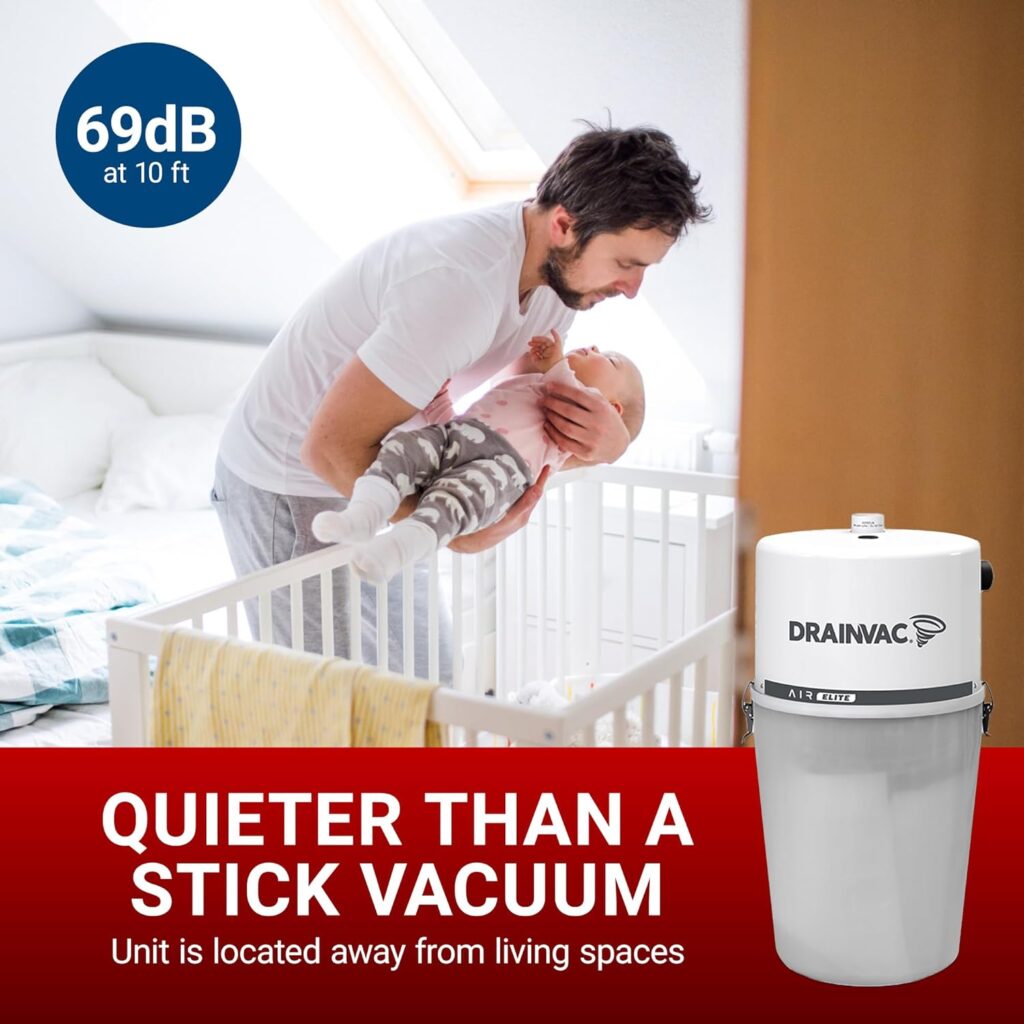
Central vacuum power units generate 60-70 dB of sound at the unit itself, but because they’re located in garages or utility rooms, living space noise drops to 45-55 dB. This is significantly quieter than portable vacuums operating at 75-85 dB right next to you.
Sound-dampened housings using foam insulation and heavy-gauge steel construction reduce noise further. The difference between budget and premium units is often as much about sound quality as sound level. Premium units produce smooth motor hum whilst budget options create harsh mechanical noise.
Warranty Coverage
Warranty coverage varies dramatically between brands and directly correlates with expected reliability. Budget systems offer 1-2 year warranties. Mid-range systems provide 3-5 years. Premium manufacturers like Drainvac offer 10-year motor warranties that demonstrate exceptional confidence in their engineering.
Pay attention to what’s covered. Motor coverage is most important since motor replacement is expensive. Component warranties covering inlet valves, filters, and electrical parts add value. Labour coverage for repairs varies; some warranties cover parts only, whilst premium warranties include service calls.
Installation Planning: DIY or Professional?
The decision between DIY installation and hiring professionals significantly impacts your total investment and final results. Understanding what each approach entails helps you make realistic decisions based on your skills, available time, and budget.
DIY Installation: What’s Involved
Installing a central vacuum system yourself can save $500-$1200 in labour costs, but requires specific skills and considerable time investment. You’ll need experience with basic carpentry, electrical work, and comfort working in attics, crawl spaces, or wall cavities.
The process involves planning piping routes that minimise bends whilst maintaining proper support and slope for debris flow. You’ll cut holes for inlet valves, run PVC piping through walls or floor joists, install the power unit with proper mounting and electrical connection, and test the entire system for leaks and proper operation.
Essential tools include a reciprocating saw or hole saw for cutting inlet openings, PVC pipe cutters or saws, appropriate drill bits for various materials, fish tape for running wire, and basic electrical tools. You’ll also need safety equipment, including dust masks, safety glasses, and possibly respiratory protection for crawl space work.
Realistic time expectations for DIY installation are 20-40 hours, depending on home size and complexity. A simple single-storey installation might take a dedicated weekend, whilst multi-storey retrofits could consume several weekends. New construction installations are significantly easier than retrofits since walls are open.
Professional Installation: What to Expect
Professional installers bring experience that delivers superior results, particularly for complex retrofits. They understand optimal piping routes, proper slope maintenance, and how to minimise visible piping whilst maintaining performance. Quality installers also ensure local building code compliance.
Costs vary by region and home complexity but typically range from $500-$1200 for complete installations. This includes all labour, piping materials, inlet valves, and system testing. Some installers offer package deals that include the power unit, installation, and accessories for all-inclusive pricing.
Choose installers with specific central vacuum experience rather than general contractors. Request examples of previous installations, verify insurance coverage, and confirm warranty terms on both equipment and installation labour. Quality installers provide detailed quotes, itemising materials and labour separately.
Professional installation typically takes 6-12 hours for most homes. Single-storey properties or new construction installations proceed faster, whilst multi-storey retrofits require more time. Good installers protect your home with drop cloths, clean up thoroughly, and test the system comprehensively before leaving.
Hybrid Approach: Minimising Costs
Some homeowners choose a hybrid approach, handling simpler aspects themselves whilst hiring professionals for challenging portions. You might install the power unit and run piping in accessible areas like basements or garages, then hire professionals for piping through finished walls or complex multi-storey runs.
This approach reduces labour costs whilst ensuring critical aspects are done properly. However, coordinate carefully with installers about which portions you’ll complete versus what they’ll handle. Clear communication prevents misunderstandings that waste time and money.
Check Our List Of The Best Central Vacuum Systems
Inlet Valve Placement: Strategic Planning
Proper inlet valve placement dramatically affects how convenient and effective your central vacuum system becomes. Poor planning creates frustration, whilst thoughtful placement makes cleaning effortless.
Coverage Area Calculations
Standard hoses measure 9-12 metres long, with 10 metres being most common. Each inlet valve should cover a circular area approximately 18 metres in diameter (9-metre radius if you’re in the centre). However, walls and obstacles reduce practical reach, so conservative planning prevents coverage gaps.
Most single-storey homes need 2-4 inlet valves for complete coverage. Two-storey properties typically require 4-6 valves total. Large homes over 300 square metres might need 6-8 valves. It’s better to install slightly more valves than needed initially rather than drilling additional holes later.

Strategic Positioning Guidelines
Central hallways make excellent inlet locations because they provide access to multiple rooms. Positioning valves near high-traffic areas reduces how far you drag hoses. Consider where you actually clean most frequently rather than trying to cover every square centimetre equally.
Kitchen inlets are incredibly convenient, particularly automatic dustpan inlets that let you sweep debris directly into the system. Position these along kickboards near common sweeping paths. Many homeowners report using kitchen inlets daily, whilst other valves see only weekly use.
Avoid placing inlet valves behind furniture where you’ll need to move heavy pieces to access them. Similarly, avoid locations in tiny closets where there’s no room to manoeuvre the hose. Each inlet should have clear floor space around it for comfortable hose connection.
Multi-Storey Considerations
Multi-level homes require careful planning to ensure adequate coverage on each floor. Vertical piping runs through wall cavities or mechanical chases, with inlet valves positioned to serve each level. The power unit capacity must support the number of inlets across all floors.
Some installers recommend positioning upper-floor inlets near stairwells, allowing you to clean stairs easily from either top or bottom. However, this works only if the stairwell location provides adequate reach to all rooms on that level.
Garage and Speciality Inlets
Garage inlets provide brilliant convenience for car interior cleaning, workshop cleanup, and handling tracked-in dirt before it enters living spaces. Position these considering where you’ll park vehicles and where work benches or tool storage sit.
Some homeowners install exterior-accessible inlets for cleaning outdoor furniture, patio areas, or even boats and caravans parked near the house. These speciality inlets extend system utility beyond pure indoor cleaning.
Budget Planning and Total Cost Expectations
Understanding the complete financial picture of central vacuum installation helps you budget appropriately and avoid unwelcome surprises. The total investment includes several components beyond just the power unit purchase price.
Power Unit Costs by Tier
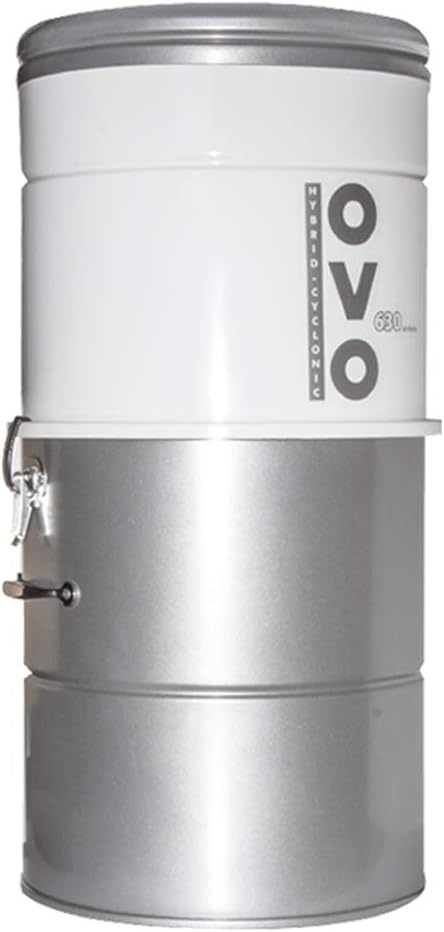
Entry-level power units suitable for smaller homes (under 200 square metres) with basic needs cost $300-$450. These typically offer 500-600 Air Watts, adequate warranties, and basic features. Brands like OVO and some NuTone models sit in this range.
Mid-range power units costing $450-$650 offer 650-700 Air Watts, better build quality, improved warranties (5-7 years), and features like HEPA filtration. These suit most homes well and represent the sweet spot of value for money. Our guide to the best central vacuum systems highlights several excellent mid-range options.
Premium power units from $650-$900+ deliver 750+ Air Watts, exceptional build quality, industry-leading warranties (10 years), and advanced features. Drainvac’s Air Elite series and high-end NuTone models occupy this tier. These make sense for large homes, demanding situations, or those prioritising maximum longevity.
Installation Material Costs
PVC piping, fittings, and supports cost approximately $3-$6 per linear metre, depending on quality and local pricing. Average installations use 30-60 metres of piping, totalling $100-$350 in materials. Complex multi-storey installations requiring more piping increase this figure.
Inlet valves range from $25-$60 each, depending on quality and features. Standard valves cost $25-$35, whilst automatic dustpan inlets cost $45-$60. Most installations need 3-6 valves, adding £100-£300 to material costs.
Low-voltage wiring, electrical connections, mounting brackets, and miscellaneous materials add another £50-£100 to the total. Quality installations use proper supports, appropriate sealants, and professional-grade components rather than cutting corners with cheap alternatives.
Hose and Accessory Costs
Quality hoses with electrical connections cost $80-$140, depending on length and features. Most homeowners purchase 9-10 metre hoses for optimal reach without excessive weight. Some purchase shorter hoses for quick jobs near certain inlets.
Telescopic wands cost $40-$70 for quality lightweight designs. Basic floor brushes cost $20-$40, whilst powered carpet cleaning heads range from $80-$200, depending on sophistication. Crevice tools, upholstery attachments, and dusting brushes add another $30-$60 for a complete set.
Total accessory investment typically reaches $200-$400 for a well-equipped system. You can start with the basics and add specialised tools over time as budget allows and needs develop.
Professional Installation Costs
Professional installation labour ranges from $500-$1200, depending on home size, complexity, and regional labour rates. Simple single-storey installations in accessible homes sit at the lower end. Complex multi-storey retrofits with finished walls throughout reach the higher end.
Some installers offer package deals combining power unit, installation, and basic accessories for $1200-$2000 total. These can represent good value if the included components meet your needs, though you sacrifice some component selection flexibility.
Total Investment Summary
Budget-conscious installations using entry-level equipment and DIY labour: $600-$900 Mid-range quality with professional installation: $1200-$1800
Premium systems with full professional installation: $1800-$2500+
These figures represent complete, operational systems ready for use. Remember, this is a long-term investment lasting 15-25 years, making it comparable to purchasing 4-6 replacement portable vacuums over the same period.

Brand Reputation and Reliability
The central vacuum market includes several established manufacturers with varying reputations for quality, reliability, and customer support. Understanding brand differences helps you make informed decisions that impact satisfaction for decades.
Leading Manufacturers
Drainvac represents the premium tier with Canadian manufacturing, 40+ years of specialisation, and industry-leading warranties (10 years on motors). Their inverted motor technology and exceptional build quality justify premium pricing. Users report exceptional longevity with many units functioning beyond 20 years.
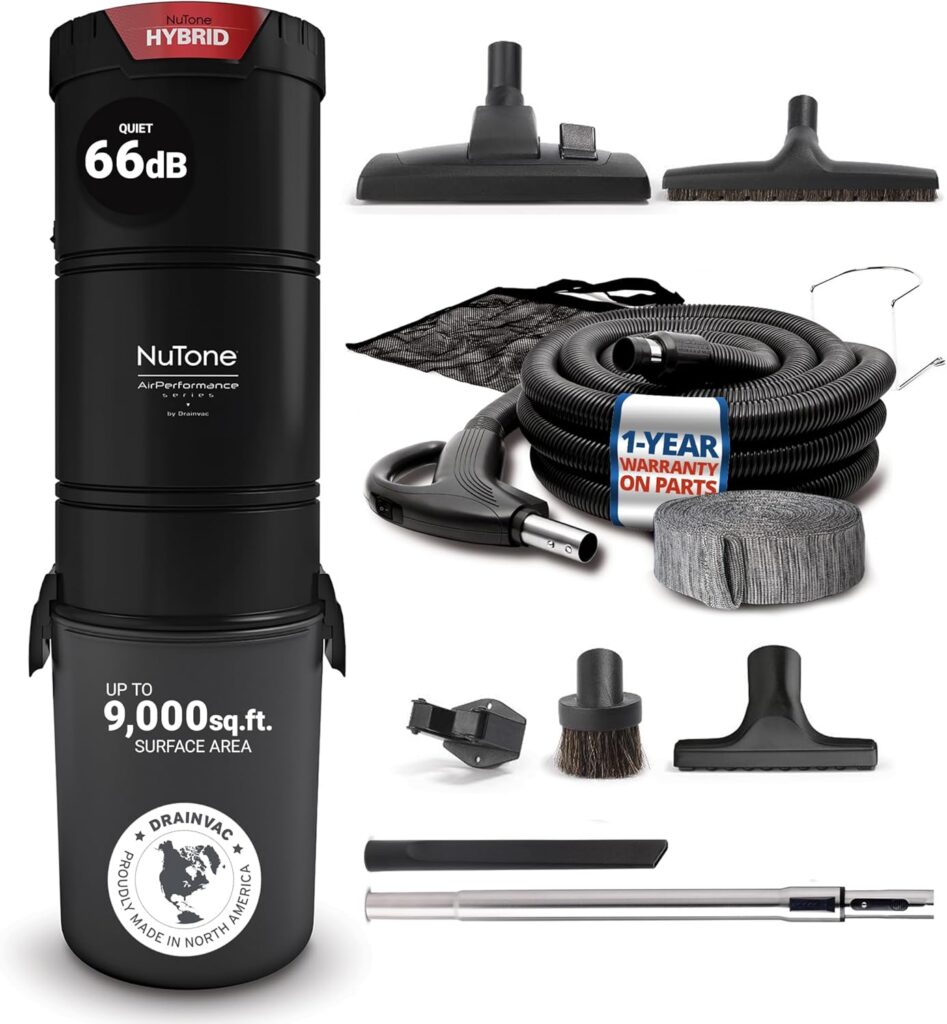
Broan-NuTone combines Drainvac engineering with NuTone’s established market presence. Their systems offer excellent performance, genuine HEPA filtration options, and comprehensive warranty coverage (5-year motors, 2 years components). The brand carries significant weight in the North American market with widespread dealer support.
OVO provides solid mid-range options with competitive specifications and reasonable pricing. Their 700 Air Watt models deliver excellent performance at lower price points than Drainvac. Warranty coverage is adequate (2-5 years, depending on model) though not industry-leading.
Beam and Electrolux manufacture quality systems with a long market history. Both brands offer various models across price tiers. Component quality and warranty terms vary by specific model, so evaluate individual systems rather than assuming brand names guarantee excellence.
Warranty Considerations
Motor warranties are most critical since motor replacement is expensive and indicates manufacturer confidence. Look for a minimum 5-year motor coverage; 7-10 years is excellent. Component warranties covering inlet valves, filters, and electrical parts add value.
Read warranty terms carefully. Some cover parts only, whilst others include labour for repairs. Warranty transferability matters if you might sell your home. Proof of professional installation may be required for some warranties, particularly extended coverage.
Parts Availability and Long-Term Support
Established brands with decades of market presence ensure parts availability for obsolete models. Drainvac and NuTone support systems installed 20+ years ago with available replacement parts. Newer brands may not support discontinued models after 5-10 years.
Dealer networks matter for service and support. Widespread dealer presence means easier access to installation services, replacement parts, and warranty repairs. Brands with limited dealer networks may require mail-ordering parts and self-service approaches.
Customer Service Reputation
Research customer service experiences through reviews and forums. Responsive customer service helps when issues arise or you need technical guidance. Brands with poor customer service reputations create frustration when you need support.
Some manufacturers offer direct customer support, whilst others require working through dealers. Direct support can be faster and more helpful, though quality dealers provide valuable local expertise and immediate assistance.
Check Our List Of The Best Central Vacuum Systems
Special Considerations for Pet Owners
Pet ownership significantly influences central vacuum system selection and installation planning. The challenges of pet hair, dander, and tracked-in dirt make powerful central vacuum systems particularly valuable investments.
Hair Management and Suction Requirements
Dogs and cats that shed heavily produce enormous quantities of hair that clog portable vacuums rapidly. Central vacuum systems with 700+ Air Watts and large capacity (18-20 litres) handle pet hair effortlessly without clogging or performance degradation.
Motorised carpet cleaning heads with anti-tangle brush rolls work brilliantly for extracting embedded pet hair from carpets and upholstery. The rotating brushes agitate carpet fibres whilst powerful suction lifts hair into the hose. This combination delivers results that portable vacuums cannot match.
Pet hair accumulates in corners, along baseboards, and under furniture, where it’s visible and frustrating. Central vacuum systems with crevice tools and proper suction reach these areas easily. The consistent power means thorough cleaning rather than merely redistributing hair.
Allergy and Dander Control
Pet dander triggers allergies and asthma symptoms in many households. Central vacuum systems vented to the exterior completely remove dander from indoor environments rather than partially recirculating it through filters. This benefit alone justifies installation for allergy-suffering pet owners.
HEPA filtration captures 99.97% of particles, including dander, dust mites, and fine dust. Systems combining exterior venting with HEPA filtration provide maximum protection. Even systems vented indoors benefit from proper filtration that captures allergens rather than releasing them.
Capacity and Maintenance with Pets
Pet-owning households generate substantially more debris than pet-free homes. The 18-20 litre capacities of central vacuum systems accommodate heavy shedding without constant emptying. Most pet owners report emptying every 1-2 months, despite multiple pets, compared to portable vacuums requiring emptying after every room.
Self-cleaning filters reduce maintenance hassles with pet hair. Pet hair can clog filters quickly, reducing suction and requiring cleaning. Systems with automatic filter cleaning maintain performance better in high-debris environments.
Strategic Inlet Placement for Pet Owners
Consider pet traffic patterns when planning inlet valve placement. Doors where pets enter from outdoors are excellent inlet locations. You can quickly vacuum muddy paws or wet fur before pets track debris throughout the house.
Sleeping areas where pets shed extensively benefit from nearby inlet valves. If pets sleep in bedrooms or have favourite furniture, position inlets for easy access to these high-shedding zones.
Common Mistakes to Avoid
Learning from others’ mistakes helps you avoid expensive regrets and disappointing results. These common errors trip up many first-time central vacuum buyers and installers.
Undersizing the Power Unit
Choosing inadequate power for your home’s size or needs creates frustration. A 500 Air Watt system might suit a small flat, but it struggles in a 250-square-metre home with thick carpeting. The modest initial savings disappoint when cleaning performance fails to impress.
Match power ratings to your actual needs. Properties over 200 square metres, homes with extensive carpeting, or pet-owning households should prioritise 700+ Air Watts. Don’t let salespeople convince you that less power is adequate when your situation demands more.
Poor Inlet Valve Placement
Installers sometimes prioritise installation ease over functional placement. Inlet valves hidden in closets, behind furniture, or in awkward corners create frustration. Every time you need to move a sofa to access an inlet, you’ll regret saving a bit of installation effort.
Plan inlet placement carefully before installation begins. Walk through your home, imagining actually using the system. Consider where furniture sits, how traffic flows, and where you’ll realistically connect hoses. Good planning prevents permanent regrets.
Skimping on Accessories
Purchasing premium power units and then using cheap accessories is false economy. Poor quality hoses kink and split. Weak floor brushes perform inadequately. Flimsy wands bend under use. Quality accessories dramatically impact your daily cleaning experience.
Budget appropriately for quality hoses (£100-£140), proper wands (£50-£70), and effective cleaning heads (£100-£200 for powered carpet tools). These components last for years and justify the investment through better results and durability.
Ignoring Maintenance Requirements
Central vacuum systems require minimal maintenance, but completely ignoring them creates problems. Allowing dirt chambers to overfill reduces performance. Never cleaning filters eventually damages motors. Neglecting inlet valve maintenance leads to electrical failures.
Establish simple maintenance routines: empty chambers every 2-3 months, inspect filters every 6 months, and annually check inlet valves for proper operation. These minimal efforts preserve performance and longevity.
Not Planning for Future Expansion
Some homeowners install exactly enough capacity for current needs without considering future possibilities. Finishing basements, converting garages, or adding extensions might require additional inlet valves. Systems at maximum inlet capacity cannot accommodate additions without expensive upgrades.
Choose systems with capacity for 1-2 additional inlets beyond immediate needs. The modest incremental cost provides flexibility for future changes without major system replacements.
Choosing Based Solely on Price
Focusing exclusively on the lowest purchase price often leads to disappointment. Budget systems may use inferior motors with short lifespans, cheaper materials that fail prematurely, or minimal warranty coverage that leaves you unprotected.
Evaluate total value, including specifications, warranty coverage, brand reputation, and expected longevity. A premium system costing £300 more initially but lasting 25 years versus 15 years represents excellent value. Our comprehensive guide to the best central vacuum systems helps you evaluate value rather than just price.
Installation Process: What to Expect
Understanding the installation process helps you prepare appropriately, whether you’re doing it yourself or hiring professionals. Knowing what’s involved lets you ask informed questions and verify work is progressing properly.
Pre-Installation Planning Phase
Before any work begins, thorough planning determines optimal power unit location, inlet valve placement, and piping routes. Walk through your home, measuring rooms, identifying obstacles, and marking preferred inlet locations. Consider furniture placement, traffic patterns, and practical cleaning scenarios.
Map piping routes that minimise bends, maintain proper support, and remain accessible for future maintenance. In existing homes, find the easiest paths through walls, floors, and ceilings. New construction allows planning piping before walls close, dramatically simplifying installation.
Verify electrical supply at the planned power unit location. Most units require standard 220-240V household current, but confirm specific requirements. Ensure adequate space for the unit, comfortable emptying access, and proper ventilation if indoor venting.
Power Unit Installation
Mount the power unit securely to wall studs or concrete using heavy-duty brackets. The unit must sit level and firmly attached to prevent vibration, noise and eventual damage. Most units mount 30-60cm above floor level for comfortable dirt chamber access.
Connect the electrical supply following local building codes. Some jurisdictions require licensed electricians for permanent appliance installation, whilst others allow homeowner electrical work. Proper grounding is essential for safety and electrical activation functionality.
Install the main exhaust piping if venting to the exterior. This typically runs through the closest exterior wall with appropriate venting that prevents pest infiltration whilst allowing airflow. Use proper sealing around exterior penetrations to maintain weatherproofing.
Piping Installation
Run PVC piping from the power unit to each planned inlet location. In existing homes, this often requires fishing pipes through wall cavities, drilling through floor joists, or running piping in basements and attics. Creative routing minimises visible piping whilst maintaining performance.
Support piping properly every 1.5-2 metres to prevent sagging that could trap debris. Maintain slight slope toward the power unit (approximately 5-10mm per metre) to assist debris flow through gravity. Avoid sharp bends that restrict airflow; use swept elbows instead of 90-degree corners.
Seal all piping joints with appropriate PVC cement and primer. Leaking joints reduce suction significantly and waste motor power. Test joints by running the system and listening for air leaks at each connection.
Inlet Valve Installation
Cut inlet valve openings to precise sizes specified by valve manufacturers. In existing walls, use stud finders to avoid cutting through structural members, wiring, or plumbing. In new construction, mark locations before drywall installation for easier cutting.
Connect piping to inlet valves with proper seals to prevent air leaks. Run low-voltage wiring to each inlet for electrical activation. Connect wiring according to system specifications, ensuring proper polarity and secure connections.
Install inlet valve faceplates flush with walls for a clean finished appearance. Many homeowners choose decorative faceplates that match existing wall sockets or light switches for cohesive aesthetics.
System Testing and Commissioning
Once installation completes, thoroughly test the entire system before closing walls or considering the job finished. Insert hoses at each inlet valve, verifying proper suction and electrical activation. Listen for air leaks throughout the piping network.
Test capacity by having multiple inlets open simultaneously to verify the motor handles the load without performance degradation. Clean any installation debris that might have entered the system during construction.
Verify proper dirt chamber installation and sealing. Test the filter system and exhaust venting. Confirm easy access for future maintenance, including chamber emptying and filter cleaning.
Check Our List Of The Best Central Vacuum Systems
Maximising Your Investment’s Value
After investing substantially in central vacuum installation, maximising the return requires using the system effectively and maintaining it properly. These strategies ensure you enjoy full benefits throughout the system’s lifespan.
Developing Effective Cleaning Routines
Central vacuum systems excel at regular light cleaning rather than infrequent deep cleaning. Quick daily or every-other-day cleaning sessions prevent debris accumulation and maintain cleanliness effortlessly. The convenience of inlet valves throughout your home makes frequent light cleaning realistic.
Focus on high-traffic areas that accumulate dirt rapidly. Hallways, entryways, and rooms where families spend most time benefit from frequent cleaning. Less-used spaces need attention less frequently, optimising your time investment.
Choosing and Using Accessories Effectively
Match cleaning tools to specific tasks for optimal results. Powered carpet tools excel on carpeting but damage hard floors. Floor brushes with soft bristles work brilliantly on hardwood and tile. Using appropriate tools delivers better results whilst protecting surfaces and extending accessory life.
Maintain accessories properly by cleaning brush rolls, removing tangled hair, and inspecting for damage. Quality accessories last years with basic care, whilst neglected tools fail prematurely and perform poorly.
Training Family Members
Teach everyone in your household how to use the central vacuum system properly. Demonstrate hose connection, appropriate tools for different surfaces, and basic troubleshooting. When multiple family members can clean effectively, maintenance responsibility spreads more evenly.
Children as young as 8-10 can often operate central vacuum systems safely. The lightweight hose is manageable for older children, potentially transforming cleaning from a parent-only chore into a shared family responsibility.
Seasonal Deep Cleaning
While regular maintenance keeps homes generally clean, occasional deep cleaning addresses neglected areas. Spring and autumn deep cleaning sessions using various attachments reach ceiling corners, air vents, behind appliances, and other overlooked spaces.
The powerful suction of central vacuum systems makes deep cleaning less exhausting than with portable vacuums. Tasks that seemed overwhelming become manageable when the equipment performs effortlessly.
Leveraging Versatility Beyond Floor Cleaning
Remember, central vacuum systems excel beyond floor cleaning. Use them for car interiors, garage cleanup, workshop dust collection, outdoor furniture cleaning, and numerous other applications. The powerful suction and convenient inlet locations enable creative uses that extend value.
Making Your Final Decision
After absorbing all this information, you need a framework for making your final decision about whether to install a central vacuum system and which specific system to choose.
Creating Your Personal Checklist
List your specific requirements based on home size, flooring types, family situation, and budget. Rank these requirements by importance. Must-have features include adequate power for your square footage and sufficient inlet valve capacity. Nice-to-have features might include HEPA filtration, specific warranty terms, or certain accessory packages.
Prioritising Must-Have Features
Focus on features that impact daily use and long-term satisfaction. Adequate power (matching home size), quality construction (ensuring longevity), and proper warranty coverage (protecting investment) matter far more than marketing hype about minor features.
Don’t obsess over features you’ll rarely use. Fancy smartphone connectivity, LED status displays, or other technological bells and whistles add cost without proportional value for most users. Focus on fundamentals that impact cleaning performance.
Reading Verified Reviews
Research specific models through verified customer reviews. Look for consistent patterns rather than isolated complaints or praise. Systems with mostly positive reviews mentioning reliability, performance, and customer service satisfaction deserve serious consideration.
Pay attention to negative reviews, particularly those describing similar use cases to yours. If multiple pet owners report inadequate suction, that’s concerning if you have pets. If small-home owners praise a system, that’s relevant if you have a small home.
Considering Professional Consultations
Quality central vacuum dealers offer free consultations that assess your home and recommend appropriate systems. Take advantage of this expertise whilst maintaining healthy scepticism about sales pressure. Consultants can identify challenges you’ve missed and suggest optimal inlet placement.
Get multiple quotes for comparison. Dealers should provide detailed written proposals specifying equipment brands and models, installation scope, warranty terms, and total costs. Compare proposals carefully, considering value rather than just the lowest price.
Trying Before Major Commitment
Some dealers offer demonstration models you can test, or they might arrange visits to homes with installed systems. Experiencing central vacuum systems firsthand helps you understand the convenience and performance before committing substantial funds.
If friends or family have central vacuum systems, ask about their experiences. What do they love? What disappoints them? Would they install another system in a future home? Real-world experiences from people you trust provide a valuable perspective.
Our Top Recommendations
After extensive research and testing, I’ve identified systems that consistently deliver excellent value across different scenarios and budgets. These recommendations suit specific situations rather than declaring one system universally best.
Check Our List Of The Best Central Vacuum Systems
Best Overall Value: OVO Heavy Duty 700 Air Watts
For most homes between 150-300 square metres, the OVO Heavy Duty system delivers excellent performance at mid-range pricing. The 700 Air Watts provides ample power for carpets and hard floors. Build quality is solid without premium pricing. The 2-year warranty is adequate, though not exceptional. Total system cost typically reaches $1200-$1600, including professional installation.
Premium Choice: Drainvac Air Elite 750 AW
For demanding situations, large homes, or those prioritising maximum longevity, the Drainvac Air Elite justifies its premium positioning. The 750 Air Watts, inverted motor technology, exceptional build quality, and 10-year motor warranty provide peace of mind. Total investment reaches $1800-$2500, including installation, but the system should function reliably for 20-25 years. Visit our detailed review at https://smartvacguide.com/best-central-vacuum-systems-the-ultimate-guide-to-whole-home-cleaning for complete specifications.
Best for Allergy Sufferers: Broan-NuTone 700 AW with HEPA
The genuine HEPA filtration combined with 700 Air Watts power makes the Broan-NuTone system ideal for allergy and asthma sufferers. When vented to the exterior, this system removes allergens completely from indoor environments. The 5-year motor warranty and established brand reputation provide confidence. Total cost typically reaches £1400-£2000 installed.
Budget-Conscious Option: OVO 650 Air Watts
For smaller homes under 200 square metres or tighter budgets, the OVO 650 Air Watts model provides adequate performance at lower pricing. The reduced power suffices for homes without extensive carpeting or extreme demands. Total installed cost often stays under £1200. This represents the entry point for quality central vacuum systems without venturing into genuinely budget equipment.
Conclusion
Installing a central vacuum system represents a significant investment in your home and your family’s daily life. Unlike purchasing a portable vacuum you might replace every few years, this decision impacts your home for decades and deserves careful consideration.
The benefits are compelling for the right situations: powerful, consistent suction that transforms cleaning results, remarkable convenience that makes cleaning less daunting, quiet operation that doesn’t disturb households, and improved air quality that benefits allergy sufferers. The long-term value proposition often favours central vacuum systems over purchasing multiple replacement portable vacuums across 20+ years.
However, central vacuum systems aren’t universal solutions. The installation complexity, substantial upfront investment, and requirement for thoughtful planning create genuine barriers. Small homes under 150 square metres, renters, those likely to move within five years, or anyone uncomfortable with significant home modifications should probably stick with quality portable vacuums.
Check Our List Of The Best Central Vacuum Systems
For homeowners in medium to large properties planning long-term residence, particularly those with pets, extensive carpeting, or family members with allergies, central vacuum installation often proves one of the most valuable home improvements you can make. The daily convenience compounds over the years of use, whilst the cleaning performance genuinely exceeds what portable vacuums deliver.
If you’re ready to move forward, start by consulting with reputable dealers for home assessments and detailed proposals. Compare multiple systems focusing on specifications, warranty coverage, and total installed costs. Read our comprehensive comparison of the best central vacuum systems at https://smartvacguide.com/best-central-vacuum-systems-the-ultimate-guide-to-whole-home-cleaning to understand how different models perform across various criteria.
Take your time with this decision. The investment is substantial, but so are the potential rewards. A properly selected and professionally installed central vacuum system should serve your family reliably for 20-25 years whilst genuinely improving your home maintenance experience. That’s a legacy investment worth making carefully and deliberately.